

How to Match Bath Taps for a Cohesive Bathroom
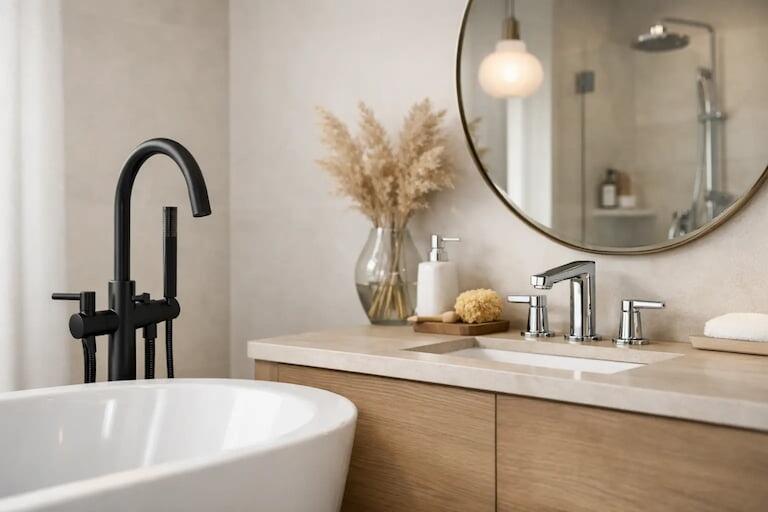
How to Match Bath Taps for a Cohesive Bathroom
A bath can be the centrepiece of a relaxing bathroom, but the wrong taps can make even a carefully chosen suite feel disconnected. Knowing how to match bath taps is about more than choosing a finish you like. The tap style, mounting position, spout reach, and water-pressure requirements all need to work with the bath and the wider room.
The aim is not necessarily to make every brassware item identical. It is to create a considered scheme that looks intentional, works reliably and still feels like a pleasure to use at the end of the day.
How to match bath taps by creating a visual thread
Start by deciding what you want the bathroom to say visually. A spa-inspired room often benefits from calm, uncluttered lines and a limited palette of finishes. A more traditional bathroom may call for softer curves, detailed handles, and a warmer metal tone. Once that direction is clear, choosing compatible bath taps becomes far more straightforward.
Your bath, basin taps, shower fittings, wastes, flush plate, and smaller accessories do not all need to come from one range. They should, however, share enough common features to feel related. Usually, this means keeping the main metal finish consistent and selecting shapes from the same design family.
Choose one principal finish
Chrome remains a popular choice because it is bright, versatile, and easy to pair with white sanitaryware. It suits both contemporary and classic bathrooms, particularly where you want a crisp, light-reflecting finish. Brushed brass brings warmth and a more luxurious character, while matt black creates contrast and can give a modern freestanding bath real presence.
For the most cohesive result, use the same finish on the bath taps, basin mixer, and shower controls. You can introduce a second finish in small doses, such as a black shower screen frame with brushed brassware, but do this deliberately. Too many competing metallic tones can make a bathroom feel pieced together rather than designed.
Remember that finishes can vary between manufacturers. Brushed brass is not a single universal colour: one brand’s brass may appear pale and satin-like, while another has a deeper golden tone. If you are mixing ranges, compare samples or view the products together before committing.
Match the shape, not just the colour
Finishing alone will not make mismatched taps look right. A sharply angular bath filler can appear out of place next to a basin mixer with ornate crosshead handles, even if both are chrome. Look for repeated design cues such as rounded spouts, slim lever handles, square profiles, or traditional detailing.
This is especially useful when your bath and basin require different tap configurations. You may need a deck-mounted basin mixer but a freestanding bath shower mixer. Selecting both in a similar silhouette helps the fittings read as part of one scheme.
Begin with the bath and its tap position
The bath itself sets several non-negotiable rules. Before falling for a particular tap design, establish whether your chosen bath has tap holes, whether it can be drilled, and where the taps can physically be installed.
A standard straight or shower bath may have two pre-drilled tap holes on the rim. In this case, a deck-mounted bath filler or bath shower mixer is often the natural choice. The tap centres must match the holes in the bath, commonly 180mm apart for a two-hole bath fitting. Always confirm the product specification rather than assuming every bath uses the same measurement.
Freestanding baths are different. Many are supplied without tap holes, leaving you free to choose a floor-standing bath shower mixer, a wall-mounted bath filler or, where the bath rim allows, and the manufacturer approves it, a deck-mounted fitting. Each option creates a distinct look and affects the installation work required.
A floor-standing tap makes a strong statement beside a freestanding bath and keeps the rim clean. It does, though, need pipework brought up through the floor and enough room around the bath for comfortable access. Wall-mounted taps can look beautifully minimal, but the valve body and pipework must be accommodated within the wall. They are best planned before tiling and before finalising studwork or wall finishes.
Check the spout reach before ordering
A tap should deliver water well into the bath, not onto the rim or too close to the edge. Measure from the tap mounting point to the centre of the bath’s internal bowl, then compare this with the manufacturer’s stated spout projection.
This detail matters most with wall-mounted and floor-standing taps, where a visually attractive design may have a shorter reach than your bath requires. A spout that lands near the waste is generally practical and reduces splashing. It should also leave sufficient room to use any hand shower comfortably.
Match bath taps to the room’s scale
Large freestanding baths can carry taller, more substantial brassware. A petite slipper bath, on the other hand, may look overwhelmed by an oversized floor-mounted mixer with a broad spout. Similarly, a compact family bathroom can feel crowded if every fitting is heavy, dark, and visually dominant.
Consider the lines you see at eye level. A slim, cylindrical tap can complement the gentle curves of an oval bath and countertop basin. Square taps often work well with rectangular baths, wall-hung furniture and straight-edged shower enclosures. There are exceptions, of course: contrast can be effective, but it needs to look purposeful rather than accidental.
If the bath is the luxury feature in the room, give it enough visual breathing space. Keep the surrounding tap choice elegant and practical, rather than making every fitting compete for attention.
Do not overlook water pressure and plumbing
A tap that looks right but takes too long to fill the bath will quickly lose its appeal. Check the minimum operating pressure for every bath tap, shower valve, and handset before purchase. This is particularly important in homes with a gravity-fed system, where pressure may be lower than in a mains-fed or pumped installation.
High-flow bath fillers are desirable for larger baths and whirlpool baths because they reduce waiting time before a soak. However, flow performance depends on your plumbing as well as the tap specification. Your installer can assess the available pressure, pipework, and whether a pump or system upgrade may be needed.
A bath shower mixer also needs thoughtful planning. The handset, hose, and diverter should be easy to reach from the bath, and the hose should not rub constantly against an exposed bath edge. For households with children or for anyone who values easy rinsing and cleaning, this flexibility can be more useful than a simple bath filler.
When a full matching set is not the best answer
Buying all brassware from one collection is the simplest route, and it can remove uncertainty over finish and styling. Yet it is not always necessary, or even the best use of your budget. You may prefer a higher-flow bath filler from one specialist range and a compact basin mixer from another.
If you mix brands, keep the main finish, handle style, and overall proportion close. Try to view them together first, especially with brushed metals and matt finishes. Also check practical details that may be hidden in product imagery, including tap-hole requirements, supplied fittings, valve compatibility, and recommended operating pressures.
A subtle difference can be acceptable. For example, a separate wall-mounted shower valve may not perfectly mirror a deck-mounted bath tap, but a matching finish and handle profile will usually create enough continuity. What tends to jar is combining very different eras of design, such as polished traditional brassware with ultra-minimal black fittings, unless the room has a clear eclectic style.
Plan the tap choice before the final fitting stage
Taps are among the last visible elements to be installed, but they should be chosen early in the renovation. Their configuration influences where pipes run, how walls are built, whether the bath needs drilling, and the order in which tiling is completed.
Before placing an order, confirm the bath type, tap-hole layout, spout projection, water-pressure requirements, and whether you need a bath filler, bath shower mixer or concealed wall-mounted solution. It is also worth checking the waste and overflow finish at the same time. These smaller details sit close to the water and have a noticeable effect on the final result.
For a project involving a whirlpool bath, allow for the bath’s technical layout as well as its appearance. Access panels, controls, and the placement of pipework should remain practical for installation and future servicing. Specialist advice at this stage can prevent a beautiful bathroom from becoming a difficult one to maintain.
The best-matched bath taps are the ones you barely have to think about once the room is finished: they fill the bath efficiently, feel right in the hand and make every element around them look more considered. Choose with the bath, plumbing and daily routine in mind, and the result will support the calm, indulgent bathroom you set out to create.